

OpenCart inventory management gets hard the day you start selling anywhere else: every Amazon or eBay sale makes your store’s counts wrong until something corrects them. OpenCart inventory sync fixes that structurally. This guide walks the whole setup, A to Z: install the InventorySync extension, create credentials, connect the store, and verify the first sync, with a real screenshot at every step.
What you need before you start
Three things, all of which you probably have already:
- An OpenCart store you administer. OpenCart 3.0.5.0, 4.0.x, or 4.1.x, on PHP 8.1 or newer. You need admin access to install extensions.
- The InventorySync REST API extension package for your OpenCart version. There are two builds, one for OpenCart 3 and one for OpenCart 4, and the install steps below are the same for both.
- An InventorySync account. The 14-day free trial covers everything in this guide, and your OpenCart store connects as a free source store on every plan.
Nothing here touches OpenCart core files and nothing requires a developer. Budget about fifteen minutes.
How to install the extension in OpenCart
If you have never installed an OpenCart module before, this is the standard marketplace extension flow, and it works the same way for any OpenCart marketplace module.
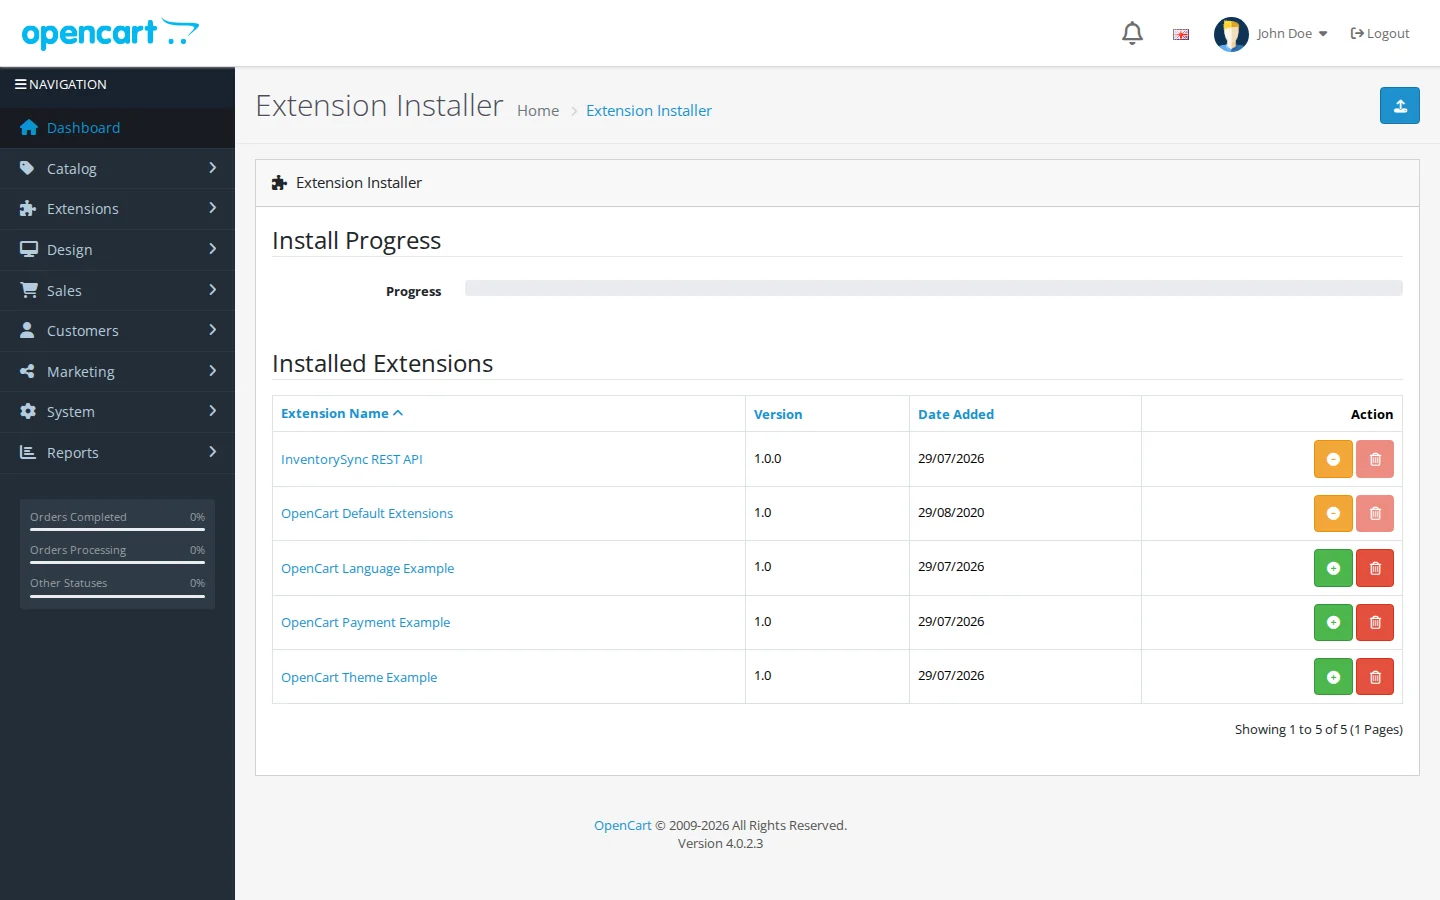
- Download the extension package (an
.ocmod.zipfile) for your OpenCart version. - In your OpenCart admin, go to Extensions > Installer and upload the package.
- Still under Extensions > Extensions, filter by Modules, find InventorySync REST API, and click install.
- Open the module. On the Settings tab, switch Enabled on and save.
Once installed, the module appears with four tabs: Settings, Security, Logging, and API Clients. You will use all four before this guide is done.
Create your API client credentials
The extension is a proper OpenCart API integration: it adds a secured REST layer to your store, with JWT-authenticated access and HMAC-signed webhooks, and API clients are how anything earns access to it.
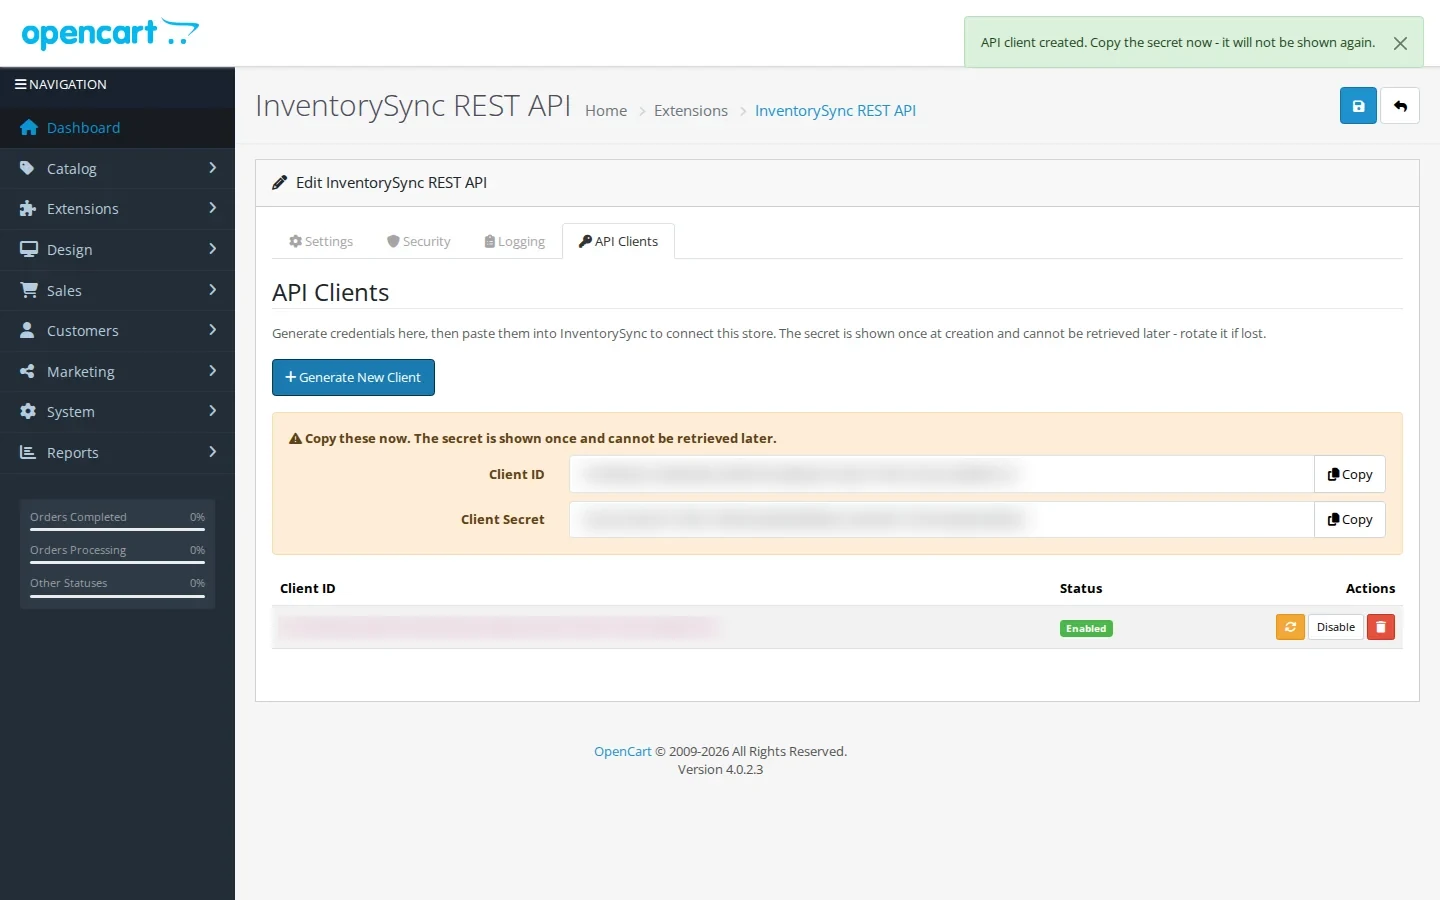
- Open the module’s API Clients tab.
- Click Generate New Client.
- Copy the Client ID and Client Secret immediately. The secret is shown once at creation and cannot be retrieved later; if you lose it, rotate the client and get a new one.
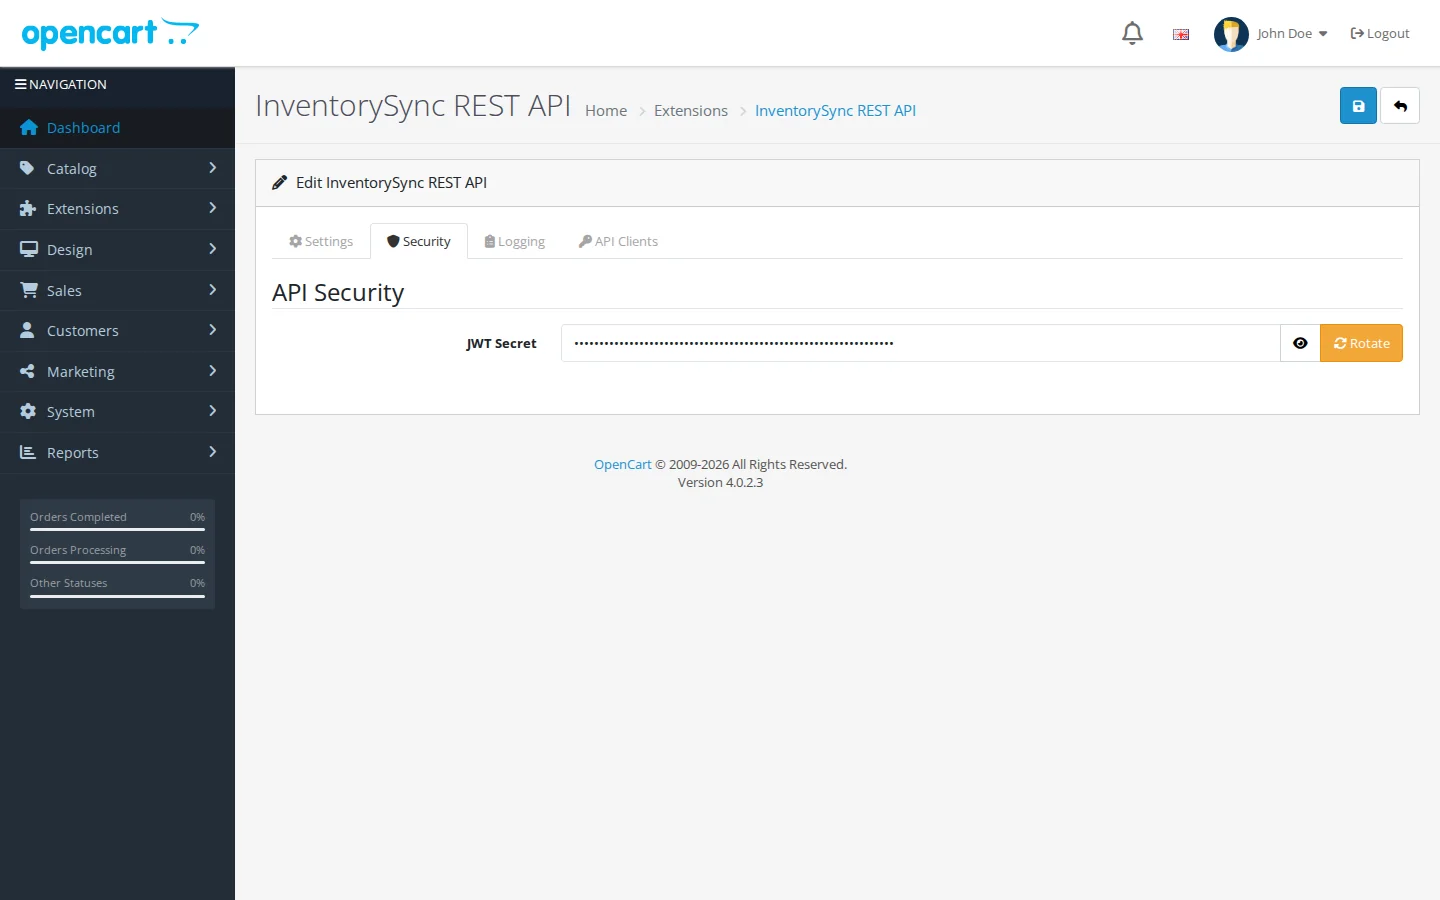
The Security tab holds the JWT secret that signs the API’s access tokens. The extension manages it for you; the one control you get is a rotate button, which instantly invalidates every issued token. That is your emergency brake if credentials ever leak.
Connect your store in InventorySync
Now switch to the InventorySync side. Sign in and go to Settings > Integrations. Every supported channel is listed with its connection status.
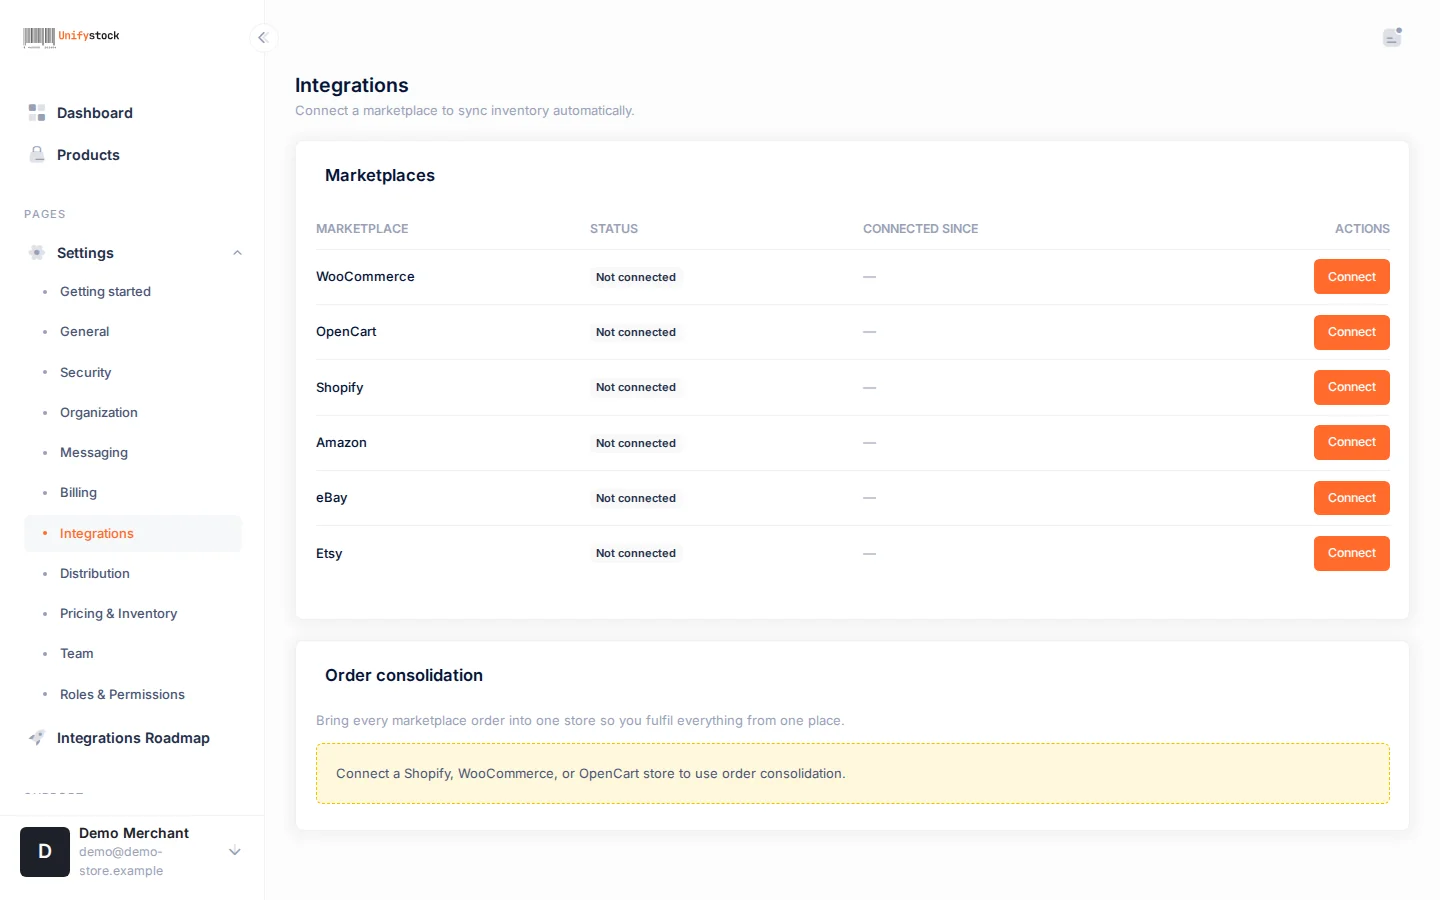
Click Connect on the OpenCart row. The dialog recaps the three steps you just did and asks for three values:
- Store URL: your store’s public address.
- Client ID: from the API Clients tab.
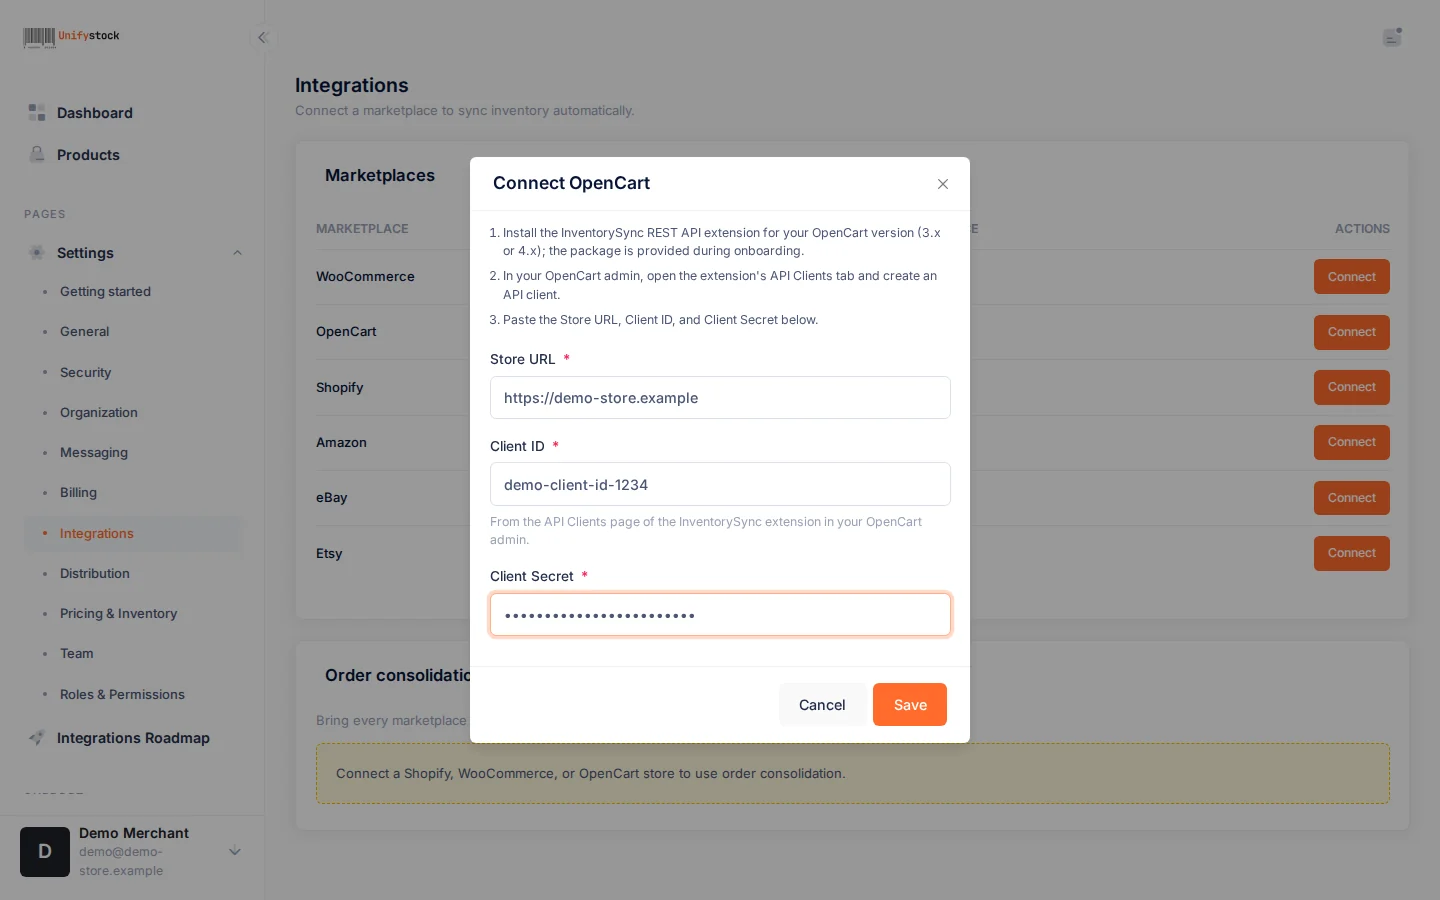
- Client Secret: the value you copied at creation.
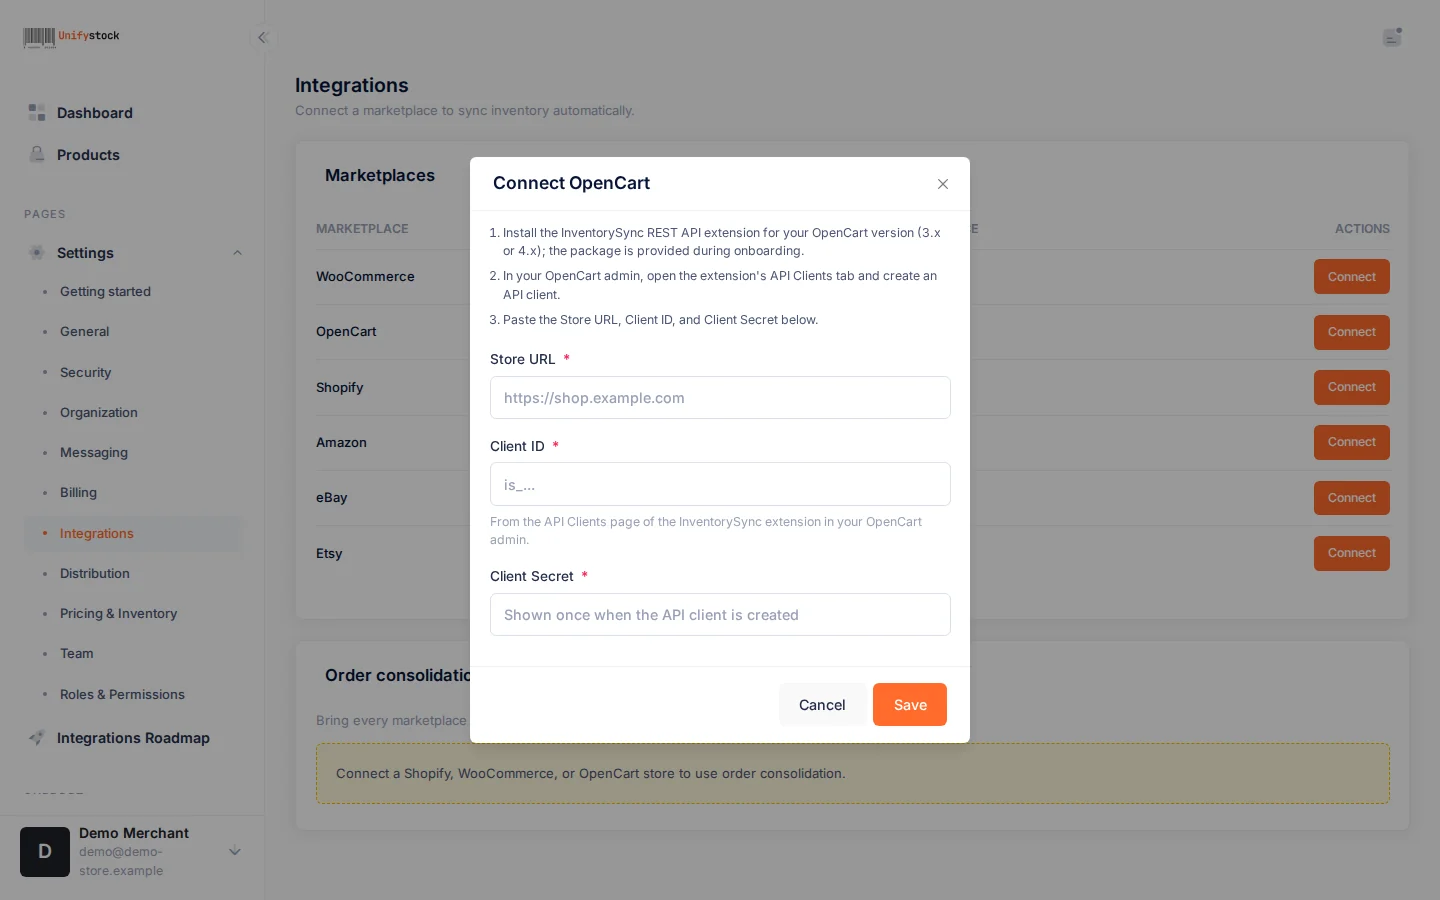
Fill the three fields and save.
Finish the handshake: webhook URL and secret
After connecting, the OpenCart row shows Connected, and a panel underneath reveals two values generated for your account: a Webhook URL and a Webhook secret.
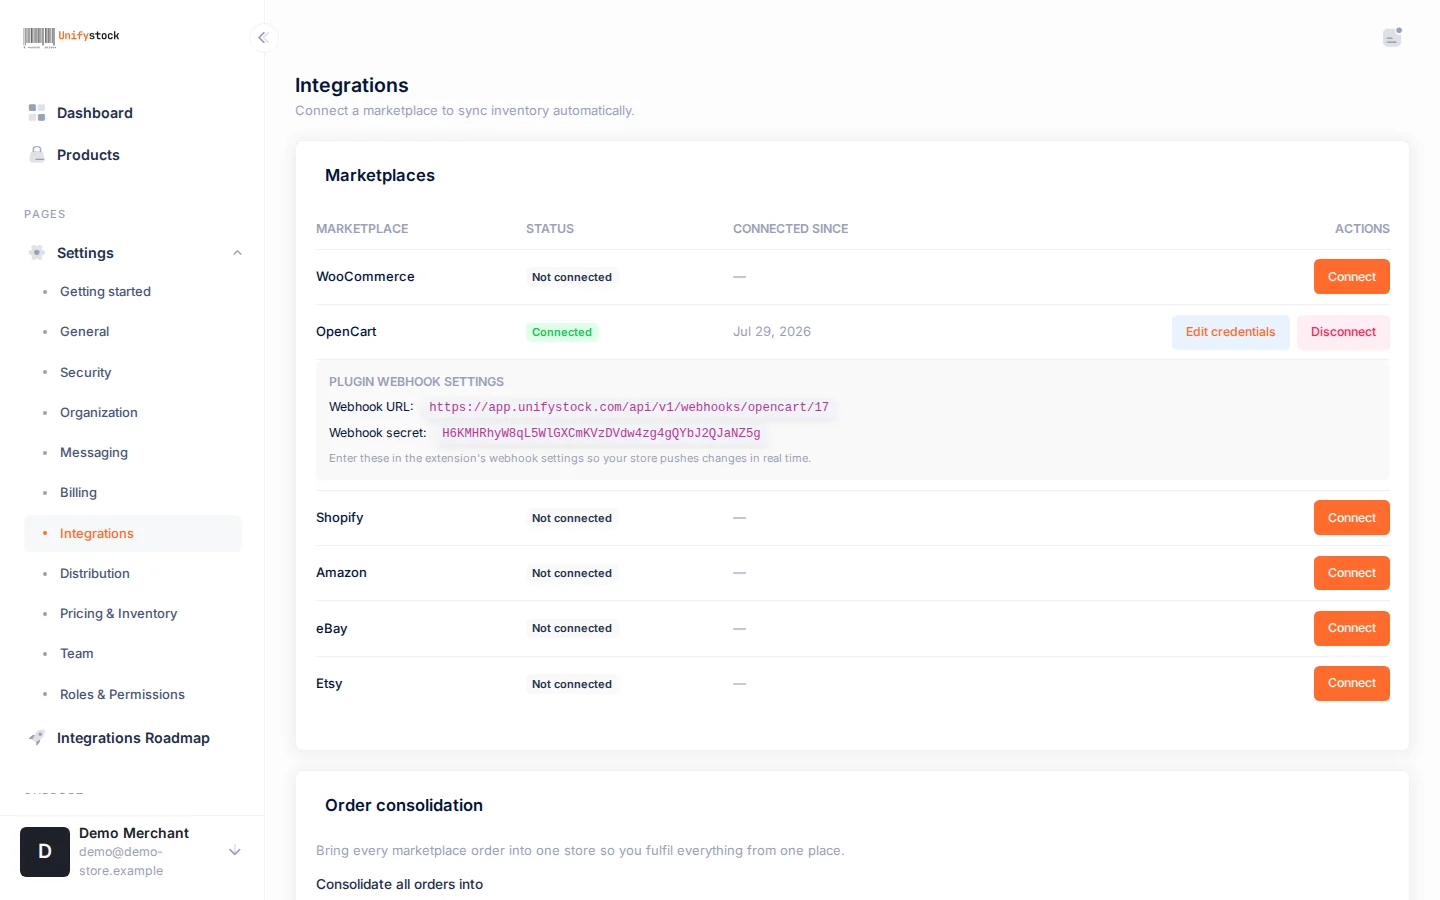
These two values are how your store reports events the moment they happen instead of waiting to be asked. Copy them back into the extension:
- In your OpenCart admin, open the module’s Settings tab.
- Paste the Webhook URL into InventorySync Webhook URL.
- Paste the secret into Webhook HMAC Secret and save.
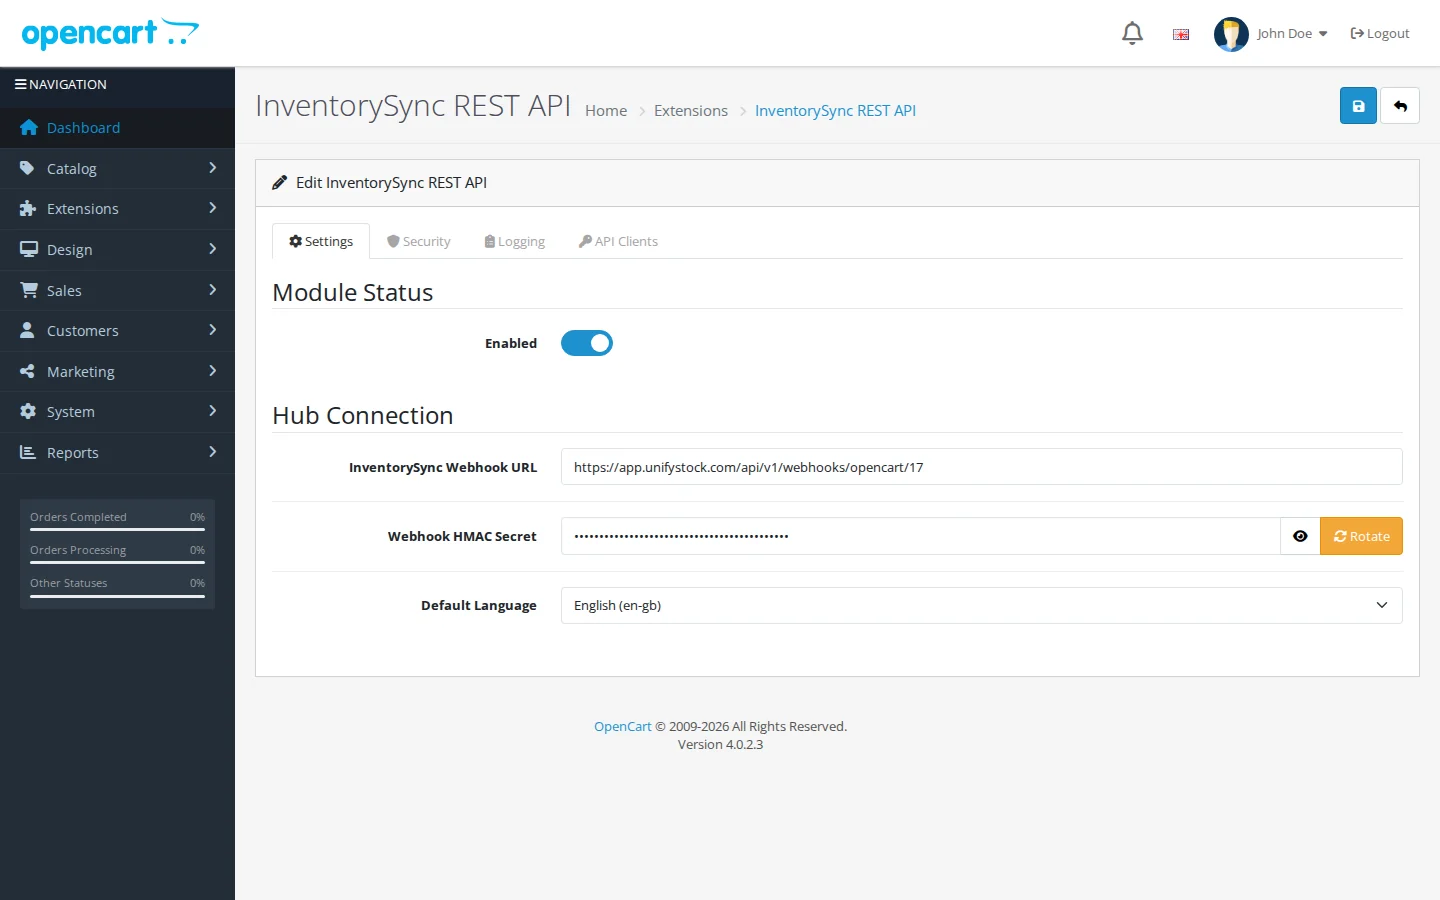
The secret signs every webhook your store sends, so InventorySync can verify each event genuinely came from your store. With this in place the loop is closed: InventorySync can read your catalog through the API, and your store pushes sales and stock edits out in real time.
Verify the first sync
Back in InventorySync, the Getting started page tracks your setup. With the store connected, step one shows a green check, and the next steps point you at connecting a sales channel.
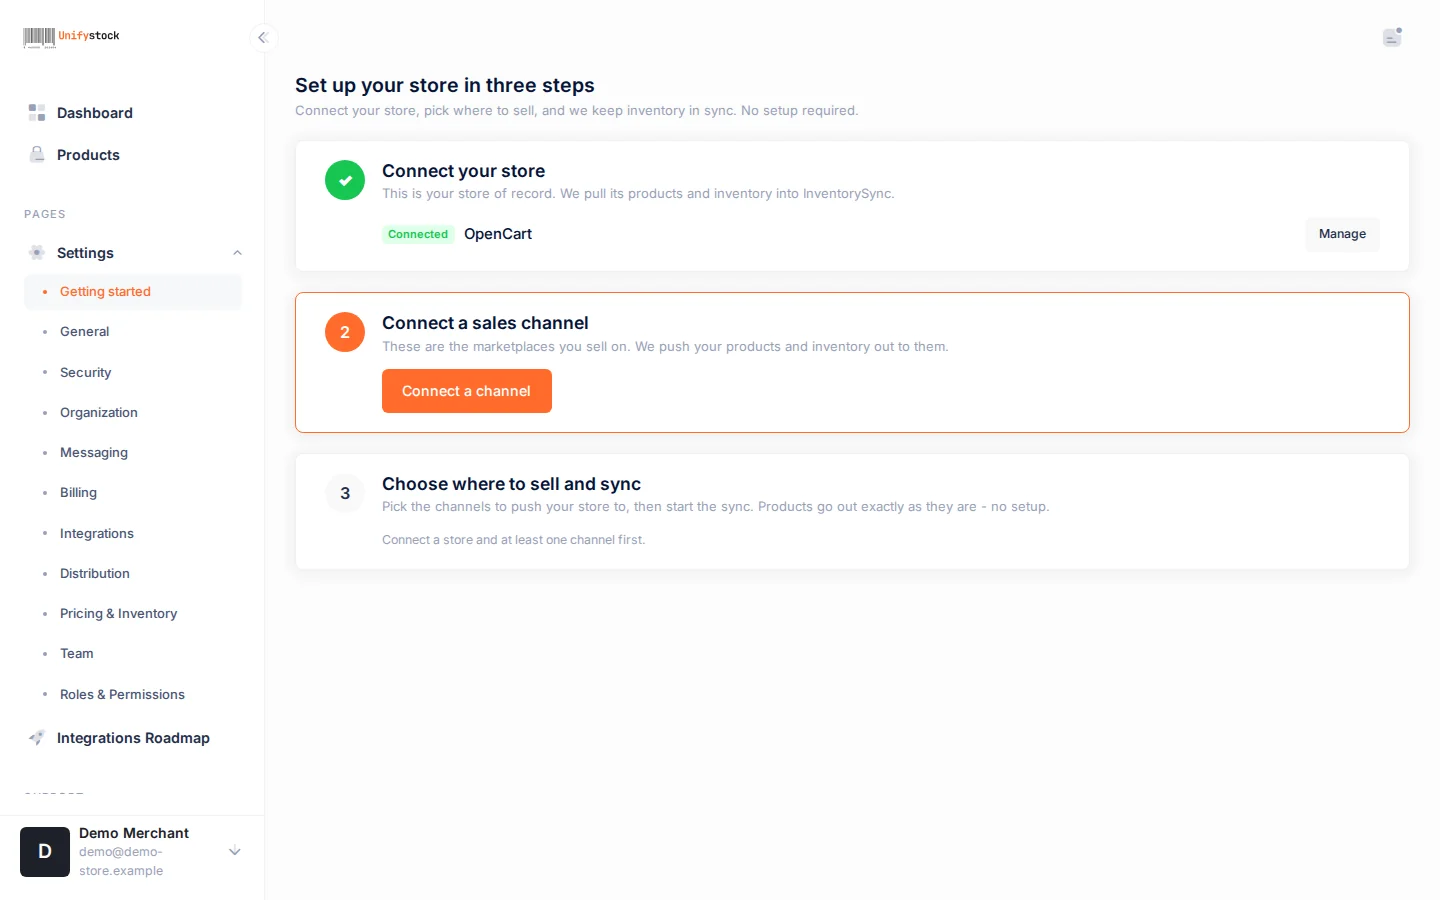
Three quick checks confirm everything is flowing:
- Products: your OpenCart catalog appears under Products as it loads in from the store.
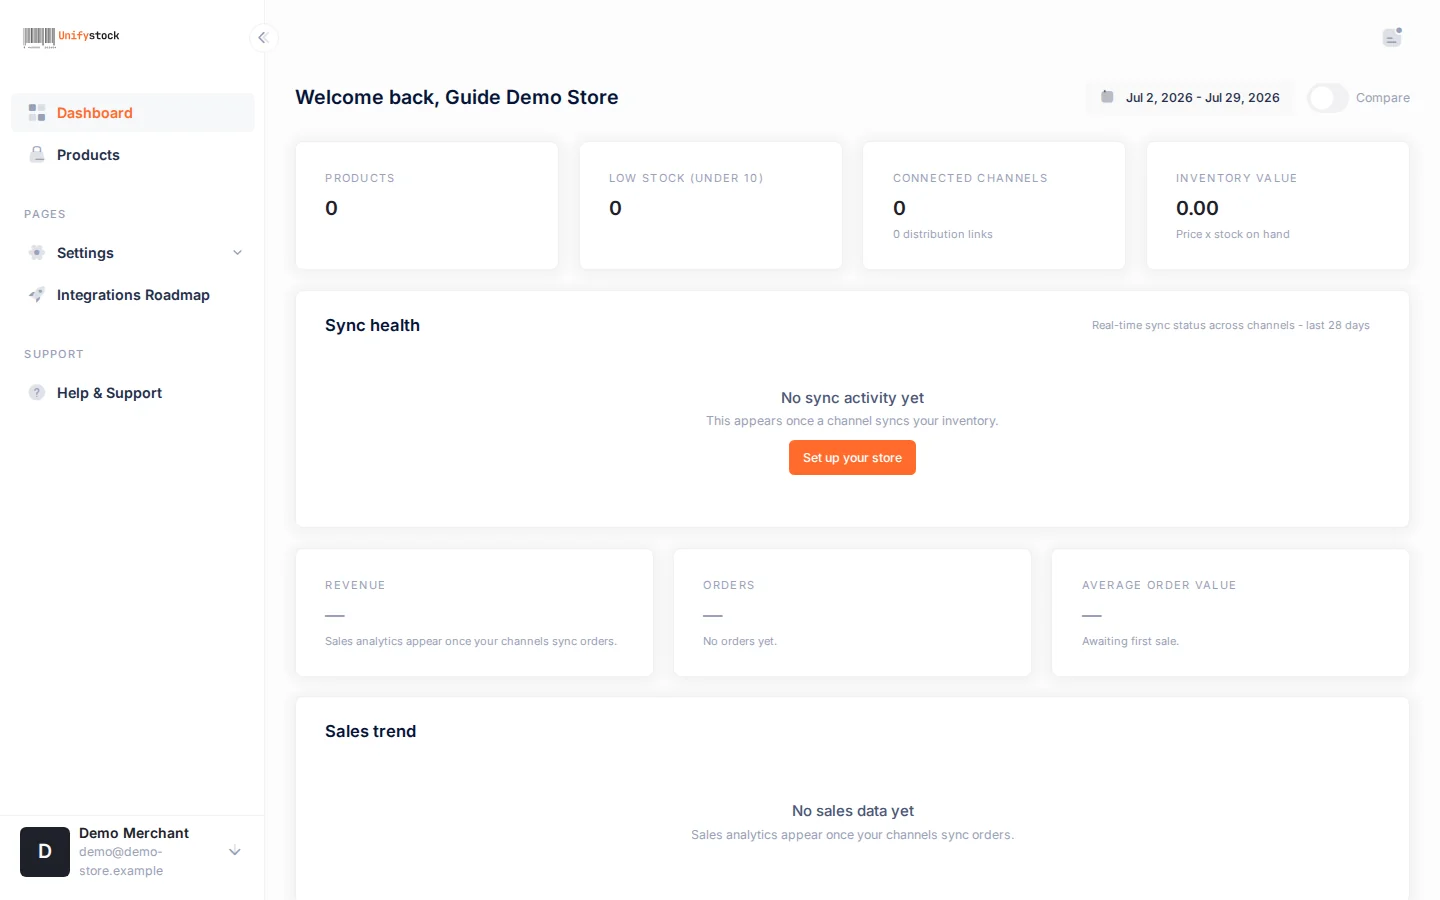
- Dashboard: the sync health panel starts reporting per-channel activity once channels begin syncing.
- A live edit: change a quantity in OpenCart and watch the product update in InventorySync without a manual refresh.
What syncs with OpenCart covers the full list of what moves in each direction.
Push OpenCart inventory to Amazon, eBay, and beyond
Connecting the store is the foundation. The payoff is distribution: OpenCart stays the source of truth while marketplaces sell from the same stock pool, which is the multichannel model in one sentence. A sale on any channel updates every other channel in seconds, which is what actually prevents overselling rather than apologizing for it.
This hub approach also sidesteps OpenCart’s thinnest area: maintained marketplace connectors. Instead of one aging extension per marketplace, or one vendor app per channel, the store connects once and channels attach to the hub.
How the OpenCart Amazon integration works
Amazon connects to your InventorySync account through Amazon’s own consent flow, on your own seller account. Offers match your OpenCart products by SKU, quantities stay agreed in near real time, and Amazon orders flow back to the hub. The OpenCart Amazon integration guide covers offer matching, pricing for Amazon’s fee stack, and FBA.
How the OpenCart eBay integration works
eBay works the same way: authorize on your own eBay account, existing listings match by SKU with their history and watchers intact, and every OpenCart stock change lands on eBay before the next buyer checks out. The OpenCart eBay integration guide goes deep on defect-rate protection and per-channel pricing.
Etsy connects through the same pattern, and Shopify or WooCommerce can run alongside OpenCart if you operate more than one storefront.
Troubleshooting common setup issues
Connection fails with an authentication error. The usual causes, in order: a typo in the Store URL, a Client Secret pasted from the wrong client, or a client that was disabled or rotated in the API Clients tab. Generate a fresh client and reconnect with the new pair.
Everything returns an error after it worked before. Check the module’s Enabled toggle. Disabling the module is a deliberate kill switch: it halts the REST API and outgoing webhooks in one move. Rotating the JWT secret has a similar effect on existing sessions by design.
Stock edits in the store are slow to appear. That points at the webhook half of the handshake. Confirm the Webhook URL and HMAC secret in the extension’s Settings tab exactly match the values shown on your InventorySync integrations page.
When you need evidence. The extension’s Logging tab keeps a store-side log with a configurable level and retention, and a download button, so you can see every request and webhook from your store’s point of view. On the InventorySync side, per-channel sync health gives you the hub’s view of the same traffic.
Your store, every shelf
The whole setup is an upload, a toggle, two copy-pastes, and a connect dialog. From there, OpenCart inventory management stops being a per-marketplace chore: one stock pool, real-time sync, and channels you add when you are ready. Start the 14-day free trial, connect your store free, and put your first marketplace on the same shelf, or see how the economics compare with budget multichannel tools first.